How to do a sugar manicure at home. Stylish nail design with sand: step-by-step instructions for Velvet manicure
Beautiful, well-groomed hands add attractiveness to a woman's appearance. And in this case, you can’t do without a manicure, which can literally transform your nails and make the skin of your hands soft and silky. Currently, there are many types of manicure. Quite common are edged, hardware and spa manicures. The nails are covered with varnish, gel or acrylic powder. All this undoubtedly gives a beautiful appearance and for a long time saves a woman from the need to touch up chipped nails every day. The coatings used are distinguished not only by their pleasant aesthetic appearance, but also by their durability. However, recently a new product has appeared in the nail industry - sugar nail design. We will show photos of marigolds with this coating below in the article.
Initially, masters did this manicure using grains of sugar, but it was short-lived, since the particles dissolved under the influence of water, and considering how many times a day the hands are exposed to water, such a coating is unlikely to last until the end of the day. Subsequently, they came up with an alternative to this material and created melange powder.

What is melange for nails?
Melange is tiny grains of sand. Outwardly, it is very similar to transparent powder. Its color changes easily depending on the coating on which it is applied. Suitable for use on extended and natural nails. Using this material you can make the surface of your nails smooth or rough. This product is equally suitable for gel polish and regular polish. The variety of colors of this material allows the most fastidious people to perform a manicure.
How to do a sugar manicure
Ease of use allows you to perform a manicure with its help not only in the salon, but also at home. The following tools should be at hand: varnish and gel, base coat, gloss, spatula and fan brush.
The first step is to apply a base coat to your nails. After which gel polish or just regular polish is applied. Next, using a spatula, sprinkle the nails with shiny melange particles. You can simply dip your nail into a jar of this sand and then simply brush off the excess.

Of course, in terms of durability of the coating and wear time, the gel coating wins. True, for such a manicure you will have to use a llama for drying with ultraviolet radiation. You can initially mix sand particles with gel and apply them to your nails, and then simply dry them in a lamp.
To perform a manicure in a salon, the master will need a set consisting of flock (colored sand), a device for gluing the smallest particles of sand to the nails, a brush with voluminous and long bristles and a metal stand. There are usually seven varieties of sand in a set. A small amount of sand is placed into the apparatus. The nail is pre-coated with gel or varnish, and then it is placed on a stand and the apparatus with sand is turned on. Then the nail is processed under the influence of the rays of the lamp. Each nail is covered in this way. After the procedure, it is advisable not to contact water for several hours to better fix the material on the nail.

Benefits of sugar manicure
There are many advantages to this type of manicure. First of all, it looks unusual and attracts the attention of others. This coating can be used to treat the entire nail plate or apply it in the form of a pattern. This material is very light, so it can be used at home. This manicure takes no more than thirty minutes. Due to the strength of the sand particles, the coating adheres very firmly to the nails, providing long-lasting coverage, which is very important for women who spend a lot of time doing household chores and exposing their hands to water.

Disadvantages of sugar manicure
This procedure also has disadvantages. First of all, this is a fairly high price, and this is explained by the fact that this type of manicure is a new product. Doing it yourself, of course, will not provide the coverage that a salon procedure will provide.
If all this does not scare the girl and she still decides to do such a manicure at home, then she must adhere to the following recommendations.
Manicure with regular polish
First, you should do a regular manicure, remove the cuticles and give your nails the desired shape with a nail file. After this, you need to apply nail polish. The sand must be the same color as the varnish, so you need to take care of this in advance.
Next, you should apply a second layer of varnish to your nails and until it dries, cover your nails with melange sand. First, you should sprinkle the entire nail with the material, without touching the surface of the nail, and only when the entire nail is covered with sand, you can rub it a little into the surface. Now you can use a brush and brush off the excess. This should be done after the nails are dry.
You can additionally coat your nails with clear varnish to remove roughness. For those to whom this detail does not cause discomfort, you can leave everything as is.

Manicure with gel
The initial stage is the same: perform a manicure and shape your nails. Next, you should apply the gel to your nails with a special brush and dry each nail in succession in a lamp. If several layers of gel are applied, each of them should be dried. After the first layer of gel, you can mix some of it with melange sand and apply it like that to the nail. This is necessary to remove roughness from the nails, since under the influence of the lamp the layer will dry out and sand particles will be inside the gel coating.
If a girl wants to get a natural sugar coating, then after applying the second layer of gel, she should not dry it in a lamp, but first apply sand particles to it with a brush. It is best to do this over a jar of product so that you do not end up wasting a lot of material.
Then you should carefully remove the excess with a fan brush and fix the result in the lamp. After the nails have dried, you can use a hard brush to smooth out the edges of the nail.
This manicure looks especially beautiful in the summer, made in bright colors. Reviews of girls who use this type of coating indicate its high durability.
Video on the topic of the article
Favorite fairytale winter time! We especially love winter on New Year's Eve. No one can really explain their feelings and emotions when the first snow falls, when we automatically buy tangerines at the market, when we see New Year’s garlands on the streets, everyone just smiles mysteriously happily in anticipation of something.. Something new, unknown, but sure the best! Every little thing associated with the New Year incredibly makes us stop for a moment and think about something pleasant. This little thing can be banal Christmas tree decorations or tangerine peels in the snow, a sprig of spruce or a winter design on the nails of your best friend. And the winter design on your nails will delight you every day and bring you closer to the main holiday of the year! Therefore, let’s not waste time and start making an interesting sugar design that is fashionable this season, which I called “Sugar Net”.
To do this, we need a gel polish system so that the design we make can delight us for more than one week!
Let's start with the standard preparation of nails for gel polish coating.
To create a sugar manicure we will need:
- A file for natural nails, a buffer with medium abrasiveness, a preparator (if necessary), a dehydrator and a bond.

- Base and top coat, colored varnishes. In my case, it is pearlescent blue, deep blue with multi-colored sparkles, and black. Powdered sugar for nail design, white gel paint, natural brush.

Let's start creating a manicure.
We give the nails a shape.

Using a buff, remove the gloss.
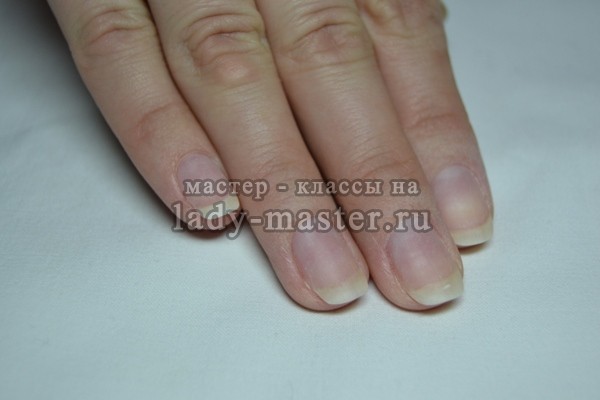
We process it with a preparator.
We apply a dehydrator.


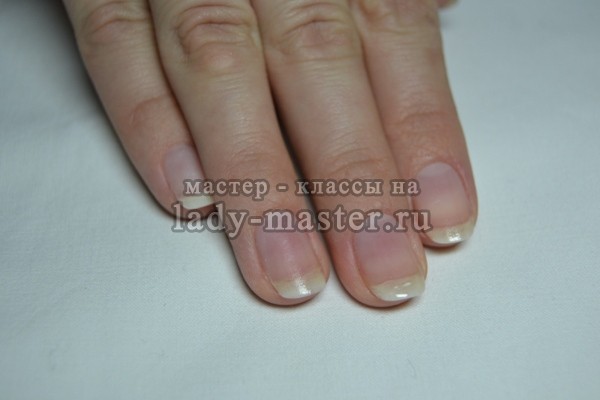
Cover with base coat.

Apply black varnish. I used it as a base to brighten up the blue polishes.

Apply blue polish to all nails, highlight the ring nail with blue, and cover with top coat.
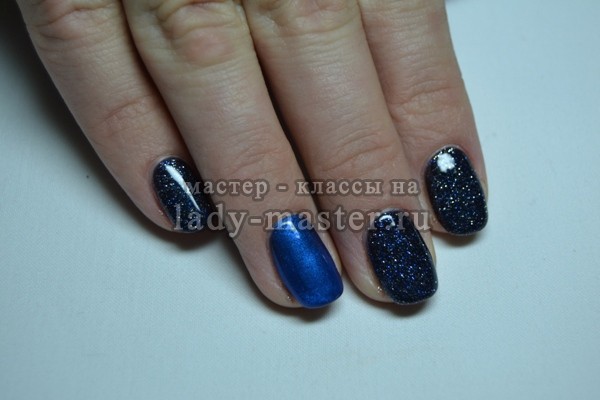
Using paint and a brush, we draw circles and ovals like these in a chaotic manner.

We fill the gaps between the circles with paint, carefully outline the entire nail, without getting it on the skin.

We take the powder and sprinkle it liberally onto the wet paint, give it a couple of seconds for the glitter to absorb into the paint, and then put it in the lamp.

Shake the powder and the design is ready.
Girls always want to make their figure perfect. What is considered the biggest threat to a ripped body? That's right, sugar. It harms not only external data, but also has a detrimental effect on the entire...
Girls always want to make their figure perfect. What is considered the biggest threat to a ripped body? That's right, sugar. It harms not only external data, but also has a detrimental effect on the entire condition of the body.
If you have given up such a sweet product for the sake of your figure and health, what is stopping you from making yourself sugar marigolds? This way you will enjoy a “delicious treat”, and your body will not suffer from it.
Sugar manicure, some time ago, was done using ordinary natural sugar crystals. But firstly, this is very inconvenient, since the grains are very large for design, and secondly, such a manicure is not durable. The sugar will immediately dissolve if you simply wash your hands.
Thanks to the manufacturers of nail service products who came up with melange powder. With its help, you can make an amazing marmalade manicure that will delight you for a long time.
Melange- These are small multi-colored or plain sand grains.
Melange rubbing is very easy to use; it is suitable for both regular varnish and gel coating. You can also end up with a “rough” manicure or a smooth multi-colored design.
Let's get started with the powder application process.
For regular varnish
Step 1. Do a standard manicure procedure. Cover your nails with a polish that matches your polish in tone. Dry your nails. If the sand grains are multi-colored, choose a varnish that matches one of the colors of the crystals.
Step 2. Apply a second layer of varnish and, without waiting for it to dry, apply the melange to the nail with light tapping movements. During the procedure, make sure that at first you do not touch the nail with your finger, then, when the entire nail plate is covered with powder, you can apply a little force to press it into the coating.
Step 3. Using a fan brush, remove excess powder from the nail and wait until the coating dries.
For gel polish
Step 1. Do a standard manicure procedure, cover your nails with a base and dry in a lamp. Apply gel polish to your nails in two layers, and after each coat, polymerize your nails in a lamp. To ensure that your marmalade manicure is not rough, we begin decorating our nails now.
Step 2. Apply melange powder to the residual stickiness of the gel polish using a brush or pusher. It is better to do the procedure over a jar with rubbing, this way you will save material. Pour a little topcoat onto the foil (to prevent sand particles from getting into the bottle) and use a brush from the used finish. Cover the design with a top coat and dry it in a lamp a little longer than you usually do.
Step 3. For a rough manicure: after you have dried the background gel polish, you need to apply a top coat to your nails and do not dry it. Sprinkle the nail plate with melange. Using a fan brush, remove excess grains of sand, do not do this too actively - you may damage the design. Dry your nails in a lamp. Use a stiff brush to remove any raised edges of powder.
The design is ready. Enjoy a low-calorie manicure that will lift your spirits anytime.
By rubbing melange you can create the following amazing designs:


Marmalade manicure is good for your health and mood. Be beautiful!
In search of new original solutions for manicure, girls use the most unusual materials and decorative elements. One such solution is the use of velvet sand.
Outwardly, it looks like coarsely ground powder; if desired, you can make it shiny or add other decorations.
We invented velvet sand for use with gel polishes. Despite the fact that a top coat is not applied on top, the manicure is voluminous and long-lasting.
The advantages of the coating include ease of application, and the use of special tools is not required.
Even a novice master can create a manicure with this material at home.
Velvet sand, similar to colored dust, is applied to the wet gel polish. This produces a coating reminiscent of fabric - velvet.
The grains lie on the nail evenly and easily. This manicure is suitable for both everyday life and special occasions.  Sand can be of large and small fractions. The large one looks like balls and is usually used to highlight one or two nails. It is more difficult to work with than with fine sand.
The most common middle faction, with it you can find many interesting ideas on marigolds.
The latter is called flock, in beauty salons it is applied with a special device - a flocker, it distributes the powder evenly and the manicure is almost perfect. If there are no such tools, you can pour the material using improvised means.
Advantages:
- unusual coating design, which can be achieved using sand fraction,
- durability of manicure - you can safely do cleaning, wash dishes, but it is better to use protective gloves,
- ease of technology - even if this is your first time picking up gel polish with sand, your manicure will most likely be successful,
- You can buy consumables in stores for manicurists and online.
The cost of one jar of velvety powder starts from 60 rubles. The smaller the grains of sand, the neater the manicure will be.
If you cannot find everything you need for such a manicure, you can use scrapbooking powder - it is sold in craft stores. Coarse acrylic powder is also suitable.
How to make gel polish design with sand - instructions
VIDEO INSTRUCTION
To create a design with a velvet coating, you must follow this algorithm:
- Prepare the nail plate: remove the cuticle, give the nails the desired shape, remove the lipid layer with a buffer, apply a primer.
- Apply base coat and dry it.
- Apply gel polish in two layers, dry each layer under a UV lamp.
- We fix the color with a finishing layer, dry it and remove the stickiness.
- Let's start drawing. In our example, the pattern is curls - this is the simplest pattern for initial drawing. For elegance of execution, it is better to use a thin brush. Drop the desired color of gel polish onto the foil and paint with a semi-dry brush (as in the photo).
- After finishing the sketch, pour acrylic powder onto the wet, undried pattern. It is very convenient to work as a pusher, picking up sand as if in a spoon. Sprinkle it, sparing no material, so that the grains completely cover the pattern. It is better to do this over a jar so that you can immediately shake off the excess into it. Now you can dry the marigolds for three to four minutes. When the pattern has set, brush off the excess sand. Manicure with velvet sand is ready.
Little tricks:
- It is very convenient to make a drawing with gel paint, since it does not flow and remains voluminous.
- The design may “slide” along with the powder due to poor drying - longer drying under a lamp will help to avoid this. This is especially true for colored acrylic powder and powder in dark colors. You can also wait a little for the powder to absorb, and only then put your hands under the lamp.
- In the case of gel polishes, drying for 2 minutes in an LED lamp and 4 minutes in a fluorescent lamp is sufficient; if gel paint is used, then 1-1.5 minutes in an LED lamp and 6 minutes in a fluorescent lamp.
- Check the condition of the lamps in the fluorescent lamp - the old ones dry poorly and therefore require replacement.
- To make the design less dirty, use a base for regular varnish. It is liquid, lays down in a thin layer, and dries quickly. Apply it in a thin layer to the pattern with a semi-dry brush, trampling it in a little. It will flow between the grains and dry as an invisible film. Under such “protection” the roses will not lose their velvety texture, but will not get dirty.
Some useful tips for those who decide to design with a velvety surface:
- You can give a classic French jacket a twist by decorating the tip of the nail with white sand and silver rhinestones,
- do not skimp on the material, pour it in large quantities,
- It is better to place the main emphasis in manicure on the velvet coating, and not on varnish,
- dry the velvet sand thoroughly under a UV lamp,
- combine different shades, apply patterns - experiment.
VIDEO DESCRIPTION
Manicure options with velvet sand
There are a lot of ideas for implementing a manicure with a velvet pattern.
Let's consider popular options for creating original patterns using this material.
- Red varnish and sand. This manicure option will turn any shy girl into a fatal beauty. Red gel polish will always be in fashion, and if you decorate one or more nails with velvet sand, the manicure will turn out to be unusual and bright.
- Black varnish and sand. For some, black may seem too aggressive, but in combination with golden or silver velvet sand it will look elegant and stylish.
- Colored varnish and sand. If you like bright colors or want to attract attention to yourself, try combining colored gel polishes and sand. The scope for experimentation is incredibly huge, so you can safely experiment.
- Winter patterns - braids. Manicures with this pattern are most often done in the winter season. In order to emphasize the beauty of the pattern, it is sprinkled with velvet grains.
- Wedding manicure. Brides often ask artists to create designs on their nails in the form of flowers and abstract patterns using white varnish. By sprinkling the designs with sand, you can easily emphasize individual patterns and place emphasis on the ring finger.
Contrary to popular belief, this manicure is very comfortable to wear and will last as long as gel polish.
You can remove it with a special liquid for removing gel polishes; a specialist in the salon will cope with this task in 10-15 minutes.
Sand nail polish is a fun new thing in the world of manicure. Small grains of sand—sugar grains—densely cover the nails, creating a rough surface. How to choose, how to apply and remove sand varnish - read on. Many photo ideas for sand manicure are included!
What is “sand effect varnish”?
Today, probably every manufacturer offers sand nail polish. Even short nails are transformed with sugar, as it is also called, sand. Varnishes of both bright and neutral shades, having an unusual structure, will definitely decorate a woman’s hand. What does sand nail polish consist of?
Sugar or sand varnishes contain small particles, usually silicone grains of different sizes. They give the rough texture. In addition to sugar, sandy-effect varnish often contains small sparkles, giving the manicure a delicate glow. Thanks to this texture, sugar varnish lasts longer than or even more so. The grains of sand set quickly and the manicure lasts longer.

How to apply sand varnish?
Sugar manicure is no different from the simplest glossy manicure. To create it you will need a base varnish and sand or sugar varnish itself.
1. Apply base coat to your nails.
2. Paint your nails with sugar polish, after shaking the bottle. The grains of sand should be distributed throughout the varnish. Sometimes even one layer is enough for a uniform and rich shade. Two coats will give your sandy nail polish even more richness and texture. It is not necessary to use a fixative varnish, but it will help to slightly smooth out the bumpiness of the manicure.
Sand varnish dries quickly and lasts quite a long time. As the layer dries, the grains of sand appear.

How to remove sand varnish?
Removing sand varnish is not an easy task. For long-lasting friction, manufacturers suggest generously moistening a cotton pad with nail polish remover and pressing it firmly against the nail for a minute or two.
After this procedure, the sand nail polish should be soaked and removed from the surface without any problems.

How to choose sugar varnish?
Sand or sugar nail polish is included in the lines of many manufacturers: Kiko Sugar Mat, Dance Legend Sahara Crystal, Zoya Pixie Dust, Holiday Golden Rose, Color Sugar Jerden, OPI Liquid Sand.
Advice from: When buying sand-effect varnish, pay attention to its texture. Too few grains of sand will spread over the nail, and it will be possible to get the desired result only from the second or third layer. If there is a lot of sugar, the varnish will be difficult and uneven to apply.

Sugar manicure. Photo
I suggest you look at interesting ideas for sand and sugar manicure. Unusual options guaranteed!


Sugar manicure with different shades of varnish looks interesting and unusual:


Sand manicure in silver is a great option for a festive look:


Notice how beautiful the varnish looks with bright splashes:


An interesting idea for a summer sand manicure:


Sand manicure. Video
To finally understand what sand or sugar manicure is and how to do it correctly at home, watch this video:
If you want to make an interesting manicure, but have little time to create a masterpiece, then use sand-effect varnish!