Self-adhesive paper applique templates for cutting. The best ideas for three-dimensional appliqué made from colored paper - we do it together with the children! Mastering complex techniques
Paper appliqués are an excellent form of creativity for a child. This activity allows him to create his own paintings and show his artistic talent. With the help of pieces of paper, you can bring absolutely any idea to life. In order to make an applique, you just need to connect the parts cut out according to the templates in a certain order. You will find such templates for paper appliqués for children in our material.
Even the smallest children can do applique, you just have to keep in mind a number of features that must be taken into account when working with them:
- All details must be large;
- The colors of the parts are bright and saturated;
- The process itself should bring joy and pleasure to the child;
- Parents must follow safety precautions and never leave their child alone with scissors or glue!
The process of creating an application develops not only the child’s mental processes, but also helps him physically. It’s no secret that the palms of any person contain a lot of nerve endings. When working with small parts, all the endings located on the palms are massaged, which has a general strengthening effect on the child. Working with the application allows the child to develop a whole range of skills. It includes endurance, perseverance, and independence. Children begin to understand what symmetry and harmony are. It is no coincidence that the 1st grade of school gives the child many similar tasks.
Simple examples
Paper applications require very few materials:
- A thick sheet of paper or cardboard for the background;
- Colored paper;
- Glue stick or PVA with a brush;
- Napkin;
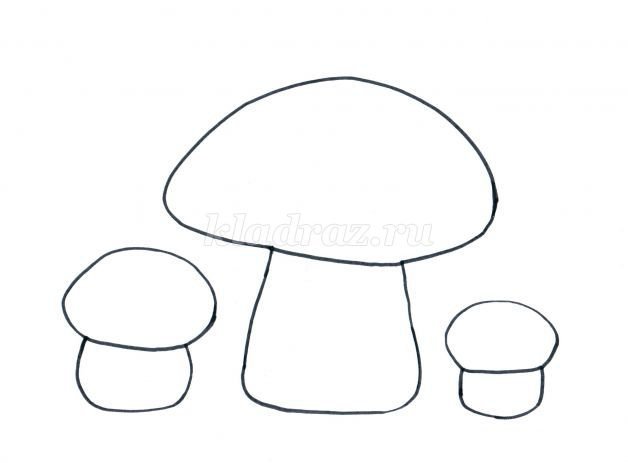
It is best to start with the simplest applications.
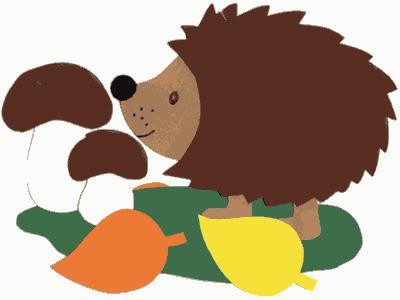
A good example is the mushroom pattern.
Flower patterns and vases:


If the child is a little older, you can create compositions using corrugated paper. Templates for paper applications for children will help.
There are several types of applications:
- Overlay – obtained by gluing various shapes onto a base.
- Symmetrical - obtained by folding a sheet of paper in half and cutting out a figure.
An example of such an application is a butterfly.

- Precipitous. Small pieces come off sheets of paper. A solid pattern is formed from them.
- Tape– allows you to decorate a whole garland. The paper is folded in several layers, a part is cut out of it, it is unfolded, resulting in a garland.
- Modular– several figures are assembled into a single whole.
- Volumetric.
Template for volumetric applique:
Paper applique templates for children will be an excellent help in creating appliques, paintings or panels to decorate the walls of a children's room. These creations will remind you of the pleasant moments associated with their production. Applique is the most exciting activity for children of any age. Little children will learn to cut, glue, and form a picture. Older children can dream up their imaginations and create real masterpieces. The easiest way is to work according to templates. The mother starts and the child continues.
Paper applique templates for children depend on the type of applique
Translated, the word “application” means application. It is necessary to cut out the figures and attach them to the general background. The work uses scissors, glue, colored paper, fabric, cereal, and ribbons. Any available means.
Conventionally, applications can be divided into types:
1. Invoice– cut out different figures and glue them to the base.
2. Symmetrical – a sheet of paper is folded in half and a figure is cut out. An example of such an application would be a butterfly.
3. Precipitous– small pieces come off from sheets of paper. Then a whole drawing is formed from them.
4. Tape– allows you to create a whole garland. For example, a flowerbed of tulips. The paper is folded in several layers and the part is cut out. Then it unfolds and it turns out to be a garland.
5. Modular– different figures are cut out, and then a single whole is assembled from them. For example, a house.
6. Silhouette– a figure, a person or an entire episode is drawn on paper. All this needs to be cut along the contour. Then you can glue it to another sheet.
Using colored paper and outlines, you can make the picture more voluminous with the help of grains.
Overlay applique
From simple details you can assemble a whole picture. First, glue the largest parts: body, head, tail, then smaller ones and finally the smallest ones.

Overhead appliques are the most common type of applique. We move from very simple applications to more complex ones.
Using this template you can make a bright applique. Simply transfer the outline onto paper and cut it out.
For this applique, we cut out from different colors of paper: a dragonfly’s tail, body, head, eyes and wings. Landscape details: lake, grass and reeds. We paste all parts onto the main background.


An example of an applied applique when grain, sand, buttons or fabric are used instead of paper. A silhouette is drawn on a general background paper. Then any materials are applied.
Symmetrical applique
 There are no limits to imagination. The pictures turn out more interesting. In addition, you can make them voluminous.
Fold a sheet of paper in half and cut out hearts of different colors but the same size. 3 pieces each. Then it is glued to the general background paper on one side and glued together on one side. The basket, which is drawn on the postcard, and also the little white clouds add volume.
A very beautiful applique that is very easy to make. All leaves are cut out the same size, folded in half and one part is glued. This flower can be given as a gift on March 8th, mother’s or grandmother’s birthday. Or give a gift just like that.
Likewise, the butterfly can be cut out in any color and further decorated with any patterns. Just fold the paper, draw the outline of the butterfly and cut it out.
Ribbon applique
There is nothing easier than ribbon applique. But the garland turns out funny. The paper is folded in several layers and a snowman is drawn. Then they cut it out and unfold it. They complement the picture with scarves and hats. Penguins are drawn in pairs. Then they unfold it and it turns out to be a cheerful round dance. Scarves and hats are cut out in the same way.


Templates for modular and silhouette applique
Modular and silhouette appliqué are somewhat similar. For both the first and the second, a picture is initially drawn and then put together into a single whole.
Modular application template. Initially, identical parts are cut out without a template. Then they begin to glue according to the principle of the invoice.

Silhouette applique templates are performed along the contours of the silhouette of objects. Most often these are black and white applications with silhouettes of people and animals, trees, flowers or any other objects. Such pictures are fascinating.
This applique method is easy to use and accessible to children who own scissors. The main thing is to choose an interesting plot and find a template.

Broken applique
Doesn't need templates. The leaves are torn into small pieces, and butterflies and flowers gather. The end result is a funny and original picture. The stem and leaves can be made solid or also formed from separate pieces.
Master class on creating a paper applique for children using a template
 Making a volumetric applique is much more difficult. The work is more suitable for children of middle and high school age. There is nothing difficult in the process, but you will have to tinker. You can make, for example, such a beautiful tree with a voluminous crown.
 To do this you should download templates for paper applique and print
on the printer. The outline of the tree along with the trunk is cut out of cardboard. Separately, cut out the trunk from brown paper.
To do this you should download templates for paper applique and print
on the printer. The outline of the tree along with the trunk is cut out of cardboard. Separately, cut out the trunk from brown paper.
To cut out parts of the crown you will need curly scissors. But you can do without them. You'll just have to fiddle with the edges longer. A tree without a three-dimensional frame will be visible from below; it is necessary to cut out the crown along the contour, approximately 1/3 of the template. Then make crowns of different sizes (see template) from green paper, which will stand out. Cut strips of yellow paper measuring 1.5 cm by 10 cm. Fold them like an accordion. 
Turn the blanks over to the wrong side and glue the accordions.
Glue the lower part of the crown to the tree. On top of the trunk.
Glue the accordions to the cardboard template so that they slightly overlap the neighboring ones. The result is a voluminous tree with a beautiful crown.
Glue the tree onto cardboard with a blue background. 
The picture is ready. Can be framed and hung on the wall.
In general, working with colored paper is a fun and useful activity. Develops fantasy, imagination, and can convey the inner world of a child. Using applique templates will do this much faster.
Three-dimensional paper applique is a unique type of children's creativity, thanks to which you can glue three-dimensional figures of animals, robots, cartoon characters, houses and even letters of the alphabet. The templates and diagrams that are on our website will help you with this.
How to do it correctly?
Although the name “volumetric applique” sounds unusual, it is not difficult to do. To do this, just print ready-made templates or diagrams, cut them out and glue them along the fold lines. The applique templates are made in such a way that by bending and gluing them along the marked lines, you can get a three-dimensional toy.
Most templates are already presented in color, so you will need to print them on a color printer. However, there are also colorless diagrams on which only conditional lines are indicated. It is enough to apply glue to the side parts of the workpiece and fold it as required by the diagram. If you decide to paint such a blank, you need to do it in advance, since it will be difficult to paint the applique in volume.
Here are some examples of such applications.
Templates
Pyramid
This is the simplest applique that a child can easily make.
- Print the template.
- Cut along the outline.
- If you want to make a colored pyramid, you need to color it before forming the pyramid or simply cut out a template from colored paper.
- Fold the parts of the workpiece intended for gluing.
- Cover them with glue and form a pyramid.
Magical forest
Colored toys
This application is a little more complicated, but its principle of operation is the same. There is no need to decorate it: you just need to print it on a color printer.
- Cut out the printed template.
- Fold the template along the fold lines.
- Lubricate the “wings” with glue and assemble SpongeBob.
- Check that the glued parts are held tightly.
poppy flower
Now let's try a more complex application - make a poppy flower.
- Print out the flower templates. If you decide to make a bouquet, you will need several blanks.
- Cut out the applique components.
- Place the flower corolla blanks on top of each other so that the petals of the top one are in the spaces between the petals of the bottom one.
- Glue the whisk together, giving it a three-dimensional shape.
- Glue the black center inside.
- Glue leaves on the outside of the flower at equal distances from each other.
- If you are making a bouquet, then each flower can be placed on a wire stem wrapped in colored paper. You can also stick flowers on a postcard or a pre-prepared base.
Such voluminous applications will look natural and simply magnificent.
Templates
You can make almost any flowers this way by printing out blanks from the website or preparing voluminous appliqués from multi-colored paper. Here, for example, is a lush carnation. However, unlike the poppy, this applique is more complex, since you will have to form the corolla of the flower from six parts.
Dog booth
Here is another more complex application. From three main parts you can put together a dog house.
- Print the templates and cut them out along the outline.
- Fold along the fold lines.
- Attach the walls to the base of the booth, forming a cube with two pentagonal walls.
- Glue the green roof on top.
The booth is ready. If you don't have a color printer at home, you can cut out parts from colored paper or simply color the blanks.
Corrugated paper
Corrugated paper is more suitable for creating voluminous appliqués. It is initially a little convex, and if you use this quality correctly, you can do interesting things.
Cornflowers
- Prepare the base for the applique. This can be cardboard or thick colored paper that is not saturated with glue.
- We apply the outlines of the drawing to the base in advance.
- From blue corrugated paper (you can take paper of any shade), cut out small squares measuring 1 sq. cm.
- Place a pencil in the center of each square and roll it slightly so that the squares take on a three-dimensional appearance.
- Without removing the pencil, apply glue to the end of the square and glue it.
- Fill the entire drawing with such squares.
This technique of applique from corrugated paper is called “trimming”. The good thing about it is that the flaws are almost invisible. It is simple enough that even kids can do it.
Hedgehogs
These voluminous appliqués made from colored corrugated paper are simple, but look simply wonderful.
- Prepare the base. It could be a candy box, colored paper, a postcard, etc.
- Fold a sheet of corrugated paper 4 or 5 times.
- Draw 2 circles. To make them even, you can use a compass, cup or glass.
- Cut out the circles. One hedgehog requires 10-15 circles.
- Glue the circles together, applying glue only in the center. The edges should remain free.
- Make frequent cuts and fluff out the ends.
- Cut out a triangular hedgehog muzzle from cardboard and glue it to the body.
- Place the hedgehogs on the base.
- Eyes, mouth and nose can be drawn with a black felt-tip pen or cut out of black paper and glued.
- In the same way, you can make flowers and grass for a clearing from corrugated paper by folding the paper and making cuts on it.
Here's what kind of hedgehogs you can get.
How to make a 3D postcard from paper?
Applications from ordinary colored or corrugated paper can be made at home, in a kindergarten or an aesthetic center. They are extremely useful for children, as they develop a sense of color shades, artistic taste, spatial thinking and a sense of composition. Cutting and gluing will have a beneficial effect on children's fine motor skills and speech development.
Show your imagination with your children!
Any type of creative activity develops a child’s imagination, perception of colors, textures and shapes, and contributes to the formation of spatial and imaginative thinking in general. Thanks to working with applications, kids learn diligence, patience and perseverance. Applique is the simplest and most accessible form of creativity for a child, because children from the age of 2 can glue cut-out figures onto cardboard.
Applications made from colored paper
For most crafts you will need:
- Colored paper or cardboard
- Scissors
- Markers
For children under 3 years old
- Finger crafts
 For such a lamb or dandelion you will need:
- Pre-cut blanks for a muzzle, eyes and legs or stems for a dandelion.
- White non-toxic paint: watercolor or gouache.
Glue the blanks onto the background, mark the boundaries - the circumference of a flower or a lamb. First, you show what needs to be done, and then let the child dip his fingers in the paint and leave fingerprints on the paper, without going beyond the drawn line.
- Crafts-stamps from pompoms
Another type of crafts that even the little ones can do.

To make this craft the following is used:
- Pom-poms as stamps,
- Paints.
Craft ideas: Christmas tree, Easter eggs, ice cream scoops, clouds, tree crown, yellow chickens.
- Caterpillar made of circles
First, you will need to draw a line on paper - the basis of the future caterpillar, and then place the circles you cut out on this line. After that, remove them and show the child where to glue the circles.
- Ice cream

For this ice cream you will need:
- Stationery glitter,
- Cosmetic cotton pads.
Cut out an ice cream cone from paper or cardboard, paint cotton sponges yellow, blue and pink. The child’s task is to stick a cone and “balls” of ice cream on paper. Sprinkle the top of the cotton pads with multi-colored glitter, which can be found in any stationery store.
- Rabbit made of cotton pads and plasticine
 Materials:
- Plasticine,
- Spaghetti optional
- Cotton pads - 4 pcs.
You cut one disk in half - these will be the ears, and the second into 4 parts - these will be the rabbit's legs. Spaghetti is used as a mustache, but they can also be made from plasticine. Form balls from plasticine or you can ask your child to make them. Then the child simply glues the details of the craft onto paper, and you make antennae for the rabbit.
- Multilayer applications
 At the age of 2-3 years, children especially love multi-layered appliqués.
You cut out the parts, show them in what order they need to be glued, and entrust the task to your child.
There is a second option for this craft - print a stencil, cut out parts from it and paint them with paints.
 For them you will need:
- Green felt-tip pen or marker,
- Cotton pads.
Cut two cotton pads in half - this will be snow, then cut out snowdrop flowers from the pads and green leaves from paper. And the child is already gluing the details of the flower onto the paper.
For children from 3 to 5 years old
These applications are more complex; the child will have to independently cut out simple parts and glue them onto paper.
- Bunny

For it you need:
- Colored paper for background,
- Green for the grass
- Pink or red for ears and nose.
The child cuts out the parts according to the template, pastes them onto the background and draws the bunny’s mustache and eyes with a felt-tip pen (if there are no blanks).
 To make ladybugs we will use red and black paper or cardboard.
Cut out 4 circles from red paper and 1 oval from black paper. We cut the oval in half, glue its parts onto the background, then glue one red circle, as shown in the image - the ladybug itself, and on top of the fold we glue the second circle, which will be the wings. We do the same with the second bug, then draw dots with black markers. Eyes can be made from paper or drawn with a felt-tip pen.
What you will need:
 Colored paper - dark blue or black for the background, red for the apples, brown for the basket and green for the leaves.
Cut out apples from red paper. We cut the brown paper into 3 long strips and 2 slightly shorter ones. Cut out leaves for apples from green paper. First we glue two apples, then 2 short strips on the side - the edges of the basket. Then we glue two strips, one on top of the apples, the other on the bottom. Glue on another apple. And the final touch is the strip from the basket in the middle.
 First we cut out an oval, which will be the penguin. Then two black hearts are the wings, one white one will be the belly, two orange ones will be the legs and one pink one will be the decoration.
Now let the child simply glue the details onto the background step by step.
- Goose made of cotton wool and seeds
 Materials for the goose:
- cotton wool,
- Colored orange napkins or white napkins and orange paint,
- Pumpkin seeds.
First, draw the outline of a goose on paper.
Glue cotton wool along the contour, glue pumpkin seeds onto the goose’s wing.
We tear the napkin into small pieces and make lumps out of them. We glue these lumps onto the beak and paws of the goose.
Use a felt-tip pen or marker to draw eyes.
- Paper lamb
You can draw such a lamb yourself, cut out the parts from cardboard and paste them onto a stencil, or print out a stencil and paint it. Using this method, you can make other animals - a rabbit, a cat, a dog or an elephant.

Draw the outline of a peacock on cardboard with a simple pencil and cut it out.
We cut out several circles from colored paper (how fluffy the tail will be depends on their number), cut each of them into 4 parts.
From one such part we make an accordion, repeat the same with the rest and glue them into a fluffy tail.
- Cactus

Necessary materials:
Paper: white for the background, green for the cactus and red for the flowers and spines.
In order to make such a cactus, you need to cut out: 3 large circles - this is the largest part of the cactus, which is located at the bottom in the image, 12 circles are slightly smaller in diameter and 3 small circles are the upper part of the cactus. We glue one large circle from below, and on both sides of it we glue two medium circles from above. From the right middle circle up to the left another middle one “grows” and from it up to the right - the smallest one. When the base of the cactus is ready, glue the rest of the corresponding size circles onto these circles and bend them in half. We repeat this procedure a third time and again bend the circles in the middle. Cut small spines from red paper and cut out flowers. Glue all the parts onto the cactus - and you're done!
- Apple tree
From green and red paper, cut out approximately 20 green stripes and 10 red ones. Draw an outline of the tree on brown cardboard, cut it out and paste it onto the background. We glue the ends of the strips together to form a circle, and glue it onto the “tree trunk”.
- Snowman
 The technique for making a snowman is similar to the previous one: we cut out several long strips from white paper, connect their ends - we get a circle. We connect several of these circles together to form a sphere - this is the body of the snowman. We do the same with the head, but for this we use slightly shorter strips. We make a scarf from the red stripe and wrap it around the snowman's neck. Using a felt-tip pen we draw eyes, a mouth and buttons. To make a carrot nose, cut out 1/4 of a circle as on a stencil and roll it into a cone. For the hat, cut out a circle and cut it like a sun.
- Bouquet of flowers using quilling technique
 At this age, children are already able to create more complex crafts, such as this bouquet.
Quilling is a technique for creating three-dimensional appliqués from rolled strips of paper.
To create such an application you will need:
- 4 green strips of paper for stems,
- 10 shorter ones for leaves,
- 1 long pink one for a bow,
- 5 stripes of red, yellow and blue.
First, we glue long strips of stems onto the background, and glue a bow on top. We glue the ends of the shorter green strips together, slightly squeeze the resulting circle to form an oval from it - these are flower leaves. We twist yellow, red and blue stripes to make flower buds and glue them onto the craft.
- Rose from a lace napkin
 This craft looks very beautiful and is extremely easy to make.
All you need to do is cut off the edge of the lace napkin and carefully twist it into a flower, so that you get a rose.
- Rose made of colored paper
 We draw a spiral on red cardboard, cut out a strip along the line and begin to twist it with our fingers until we get a bud.
The stem for the flower can be made from colored wire.
Cut out leaves from green paper and glue to the stem. Rose is ready!
- Fish - chessboard
 This application is made without glue. To begin, draw the outline of the fish on colored paper and cut it out. We bend the fish in half and start making cuts in the middle. They start approximately after the head and end before the tail. Next, we cut out strips of different colors and different lengths that form the fin.
We insert a strip of one color, for example, orange, in “waves” so that one part is above the cut and the other below it. Same with other stripes. The result should be a checkerboard pattern.
- Volume machine
 Another quite interesting application, which is also very easy to perform.
All you have to do is print out the template, color the car, cut it out and make two cuts on the protruding part at the end.
 This article contains 25 of the most interesting applications and templates for DIY paper crafts for children. It’s no secret that any form of creativity develops a child’s thinking. Paper crafts are a wonderful activity that develops perseverance and patience. In turn, working with scissors, glue, plasticine and cutting out parts of crafts develop fine motor skills.
These crafts are suitable for both home games and activities in kindergarten or classroom. The youngest children can make simple applications that require sticking several figures onto paper. From the age of 3-4, when children begin to master scissors, they can already cut out simple objects from paper and glue them together. Starting from school age, children are already able to make more complex crafts: for example, making applications using the quilling technique or cutting out small figures with a large number of details.
Applications for children are a good way to develop a child’s creative abilities, hand motor skills, imagination, and logical thinking. Children of different ages can do the appliqué. Even kids, with the help of adults, will be able to create a simple composition, for example, from circles. Children in the preparatory group can master more complex appliqué techniques.
The master class talks about the main types and stages of making appliqué from various materials.


Creative work will also interest beginning adults. From fabric, cardboard, photographs, colored sheets, beads, felt, with the help of scissors, glue and skillful hands, you can create real masterpieces.
Applique Basics
Before you understand what materials and tools are needed for appliqués, you should classify this type of decorative art.
Types and techniques of applications
The application is classified by shape, material, color, theme, and method of execution. The division into types is arbitrary. At times, the assembled composition is difficult to classify, since various materials and production technologies were used in the work.
The most complete classification of applications is presented below.
By form:
- volumetric – created with a 3D effect from napkins, corrugation, fabric, cotton wool and other materials that can hold a convex shape;
- flat - stencils are used, according to which all elements are cut out, and then glued to the surface or to each other, remaining in the same plane.


By topic:
- object - individual animate or inanimate objects with stylized detail are pasted onto the background;
- plot - details create a plot (for example, a composition on the theme of a season or a holiday);
- decorative - represents patterns and ornaments that can be used to decorate various objects.
By way of execution:
- silhouette – cutting out elements along a complex contour (this can be a ready-made color picture);
- invoice - gluing smaller elements onto a cut-out part, for example, wings, eyes, and breast are additionally glued to the body of a bird.
- torn - a pattern applied in advance or printed on the base is tightly pasted over with paper scraps;
- mosaic - creating an image by laying out identical shapes (triangles, circles, squares, etc.) on a base;
- symmetrical - cutting out elements from material folded in half (cutting starts from the fold);
- trimming - gluing twisted pieces of corrugation or napkin to the surface of the base in a vertical position;
- collage - creating a composition from ready-made images, for example, from photographs in glossy magazines.


By color:
- plain;
- multi-colored;
- two-color.
According to the method of fastening based on:

According to the material:

The composition is assembled from a variety of materials, so the list is constantly updated. Applications for children are made from any waste material that can be glued to the surface of a cardboard sheet.
Necessary tools and equipment
For work you may need materials such as:

Now that everything is ready for MK on application, you can master the methods of execution.
Execution technique
Traditional children's appliques are made from paper or cardboard. These are the first materials that children are introduced to. In this case, colored, corrugated, single-sided or double-sided paper is used. The older the child, the more difficult the application is.
With children studying in the older group, it is recommended to use additional, non-traditional methods when performing appliqué. For example, create some elements in the style of children's origami or master cutting technology.
Children in the middle group can make appliqués from different shapes. Do-it-yourself work will be a good reinforcement of knowledge about basic geometry. Application of geometric shapes is very simple: children just need to learn how to cut out squares, rectangles and circles. These simple elements can turn into real story paintings.
Geometric applications
To make it easier for children to assemble a geometric composition, it is recommended to use a ready-made diagram that will indicate the desired location of the figures.


Mosaic
Applications made from colored paper have different variations. The paper can be folded, cut into fringes, pasted in layers, torn, crumpled, twisted. All this makes it possible to fantasize together with the child, coming up with new technologies and stories.


General description of how to make an applique from paper sheets:
- print or draw applique templates yourself, cut them out;
- cut out all the necessary elements from paper using the resulting stencils;
- make a background using paints (optional);
- arrange the elements on the base, choose the best position;
- step by step glue all the details to the base, starting from the background and the largest;
- complete with pencils, felt-tip pens or paint all small elements (eyes, smile, spots, etc.).

In fact, creating an applique from colored paper is the basis for gluing compositions from other flat materials. The paper and cardboard base can be replaced with leather, felt, cotton fabric, and the manufacturing technology will remain the same.
Partial or combined application
In the younger group, you can use the most unexpected means to create simple applications. For example, cotton pads, buttons, cereals, seeds, pasta and many other materials are perfect for subject or subject composition. For kids, applications are created according to simple instructions and often require only a general template. Stencils for materials are not needed: the elements are glued on top and complement the cut out silhouette.


The older group of children are old enough to do more complex work. Children in the older group can be offered the creation of convex compositions.
Volumetric 3D
Volumetric applique is created in different ways using different materials. Cotton wool, colored or corrugated paper, napkins, yarn and much more are suitable for this purpose. For example, you can make paper ladybugs from two circles bent and glued together. Rolled strips of paper will turn into petals, and pieces of cotton wool will become clouds.


Trimming
In the preparatory group, children already know how to handle scissors, know the names of basic geometric shapes, and distinguish colors and shades. However, even for older children, creative work in the form of appliqué remains relevant.
For preschoolers 5-6 years old, it is important to prepare for school and learn teamwork. In this case, large-scale collective work with more detail is well suited. For example, children can make a mosaic from cardboard or fabric (felt), master cutting or felting. Also, collective work can be done using mixed media.
One of the simplest collective works is an appliqué made from napkins. Napkins can be rolled into balls, twisted into flagella or used for trimming. Such applications for children require perseverance, attentiveness, and well-developed hand motor skills.


The craft is done step by step as follows:
- transfer the stencils to the base;
- tear small pieces of napkin and roll them into pellets or ropes;
- for trimming, cut the napkin into squares and wrap each square on a stick (pencil, toothpick);
- start gluing the blanks along the lines of the image;
- fill, respecting the colors and borders, the inside of the picture.
Video master classes on applications in different techniques
Templates and stencils for applications


